











The Preventive Maintenance Checklist for Hydraulic CNC Machinery
Release Time:
2025-12-26
Introduction

In the metal fabrication industry, there is an old saying: 'If you don't schedule time for maintenance, your equipment will schedule it for you—usually at the worst possible moment.'
Unplanned downtime is the silent killer of profitability. When a 200-ton press brake goes down in the middle of a rush order for a key client, the cost isn't just the $500 for a new valve; it is the $50,000 in lost production, the expedited shipping fees for parts, and the reputational damage of missed deadlines.
At Havi CNC, we build our machines to be rugged, utilizing top-tier components like Bosch-Rexroth hydraulics and Schneider electrics. However, a hydraulic press brake or guillotine shear is a precision instrument. It relies on high-pressure fluid dynamics (often exceeding 250 bar), micron-level electronic positioning, and heavy mechanical forces working in unison.
This comprehensive guide is not just a list of tasks; it is an engineering breakdown of *why* maintenance matters. We will cover the chemistry of hydraulic oil failure, the mechanics of backgauge wear, and provide a rigorous checklist to keep your Havi machine running like new for decades.
1. The Lifeblood: Understanding Hydraulic Oil Physics

The most critical component of your machine is not the frame or the controller; it is the Hydraulic Oil. It performs three vital functions: Power Transmission, Lubrication (creating a film between moving metal parts), and Cooling (carrying heat away from the pump).
Viscosity Matters (ISO 32 vs 46 vs 68)
Viscosity is the oil's resistance to flow. If it's too thin, it leaks internally, and the pump cannot build pressure. If it's too thick, the pump struggles to suck it in, leading to cavitation. For most Havi machines, we recommend **ISO 46 Anti-Wear Hydraulic Oil** (e.g., Mobil DTE 25). However, in extremely hot climates (Middle East), ISO 68 may be required. In freezing climates (Russia/Canada), ISO 32 is preferred for winter.
The Enemy: Contamination Types
1. Particulate Contamination:Dust, silica, and metal shavings act like sandpaper inside your valves. A proportional servo valve has a spool clearance of only 3 to 5 microns. A single grain of shop dust can jam it.
2. Thermal Breakdown (Oxidation): If your machine runs hot (>65°C) continuously, the oil oxidizes. It turns dark and smells like burnt toast. Oxidized oil forms 'varnish' or sludge that coats the internal valve surfaces, making them sticky and slowing down the ram response.
3. Water Contamination (Emulsification): If the oil looks milky or cloudy, it has water in it. Water destroys the oil's film strength, leading to metal-on-metal contact and rapid pump destruction.
2. The Daily Checklist (Operator Level)
Time Required: 10 Minutes - Goal: Safety and Early Detection
1. Visual Leak Check:Walk around the machine. Look for puddles on the floor or oil weeping from hoses and fittings. A small weep today is a blown hose tomorrow.
2. Oil Level Check:** Check the sight glass on the tank. Is the oil level within the safety zone? Low oil causes air to enter the pump intake. This air compresses and explodes under pressure (Micro-Dieseling), pitting the metal surface of the pump.
3. The 'Cold Start' Protocol: Do not start bending max tonnage immediately on a cold winter morning. Cold oil is viscous and sluggish. Run the ram up and down for 5 minutes without load (Dry Run). This circulates the oil through the valves, warming it to operating temperature (>20°C) and ensuring the seals are pliable.
4. Backgauge Verification: Send the backgauge to a known reference position (e.g., 100mm) and measure it with a vernier caliper. If the screen says 100mm but the caliper says 101mm, the axis needs calibration or there is mechanical backlash.
3. The Weekly Checklist (Technician Level)
Time Required: 30-45 Minutes - Goal: Friction Reduction
1. Rail & Screw Lubrication:The X-axis (Backgauge) and Y-axis (Ram Guides) run on precision linear rails and ball screws. Wipe down the old, dirty grease with a clean, lint-free cloth. Apply fresh Lithium-based grease (EP2). Warning: Do not over-grease. Globs of grease act as a magnet for shop dust and metal grinding swarf, creating an abrasive grinding paste that wears out the rails faster.
2. Clean the Optical Scales:The linear scales (Heidenhain/Givi) determine the machine's accuracy. If they get covered in oil mist or dust, the machine will throw error codes or the ram will jitter. Gently wipe the scale covers with a clean cloth.
3. Air Filter Check: Check the air filters on the electrical cabinet fans and the motor cooling fan. If they are clogged with dust, the CNC controller and servo drives will overheat and shut down to protect themselves.
4. The Monthly / Annual Checklist (Maintenance Dept)
Time Required: 2-4 Hours - Goal: System Health
1. Hydraulic Filter Change:The pressure filter and return filter protect your valves. Change them religiously every 2000 hours (or annually). Do not try to 'clean' a disposable filter element with compressed air; you will blow holes in the mesh.
2. Check Accumulator Pressure:The nitrogen accumulator absorbs pressure spikes and smooths out the hydraulic flow. If the nitrogen bladder leaks, the machine will act 'jerky' and bang loudly when switching directions. Check the pre-charge pressure (typically 70% of max system pressure).
3. Machine Leveling: Over time, concrete foundations settle under the weight of a 15-ton machine. If your press brake is not perfectly level, the frame will twist. This causes the ram to bind in the guides and results in uneven bending angles. Use a precision machinist level (0.02mm/m accuracy) to re-level the machine.
4. Electrical Connections (Thermal Cycling): As the machine runs, wires heat up and expand. When off, they cool and contract. Over time, this thermal cycling loosens terminal screws. With the power LOCKED OUT, open the cabinet and tighten all terminal block screws. A loose connection causes arcing and blown circuit boards.
5. Specific Maintenance: Shear vs. Press Brake
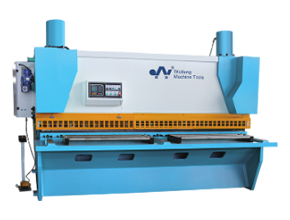
Guillotine Shear (QC11K) Specifics
Blade Gap Mechanism:This gear system must move freely. Grease the eccentric gears. Blade Rotation:Check the cutting edges. A chipped blade creates stress risers. Rotate the blade to a fresh edge (4 edges available) before a small chip becomes a catastrophic crack.
Press Brake (WE67K) Specifics
Crowning System:If you have a hydraulic crowning table, exercise it. Run it from 0% to 100% pressure to ensure the internal cylinders aren't seized from lack of use. Tooling Inspection: Check the tang of your punches and the slot of your dies. Remove any burrs or galling (metal pickup) using a fine stone.
6. Seasonal Maintenance: Winter vs. Summer
Winter Prep:Use a lighter oil (ISO 32) if the shop is unheated. Ensure heater bands on the tank are working. Increase warm-up time.
Summer Prep: Check the oil cooler / heat exchanger. Clean the radiator fins with compressed air. If the ambient temp is >40°C, ensure the electrical cabinet AC unit is functioning.
7. Data Table: Troubleshooting Common Issues
Symptom | Probable Cause | Corrective Action |
Loud Pump Noise (Screaming) | Cavitation (Low oil, Cold oil, Clogged suction) | Fill oil; Warm up; Change filter |
Slow Ram Speed | Servo valve sticky; Filter clogged | Check oil cleanliness; Change pressure filter |
Inaccurate Bend Angle | Linear scales dirty; Machine twisted | Clean scales; Re-level machine frame |
Oil Overheating (>65°C) | Cooler fan broken; Oil oxidized | Clean heat exchanger; Flush and replace oil |
Backgauge 'Jerky' | Ballscrew dirty; Belt loose | Clean screws; Tension timing belts |
Shear Cut Burred | Blade gap too large; Blade dull | Adjust gap; Rotate/Sharpen blade |
Conclusion
A Havi CNC machine is designed to last for 20 years, but it is a partnership. We provide the engineering; you provide the care.
By following this Preventive Maintenance Checklist, you ensure that your investment continues to print money for your shop, rather than consuming it in repairs. Remember: Clean oil, level frames, and tight screws are the holy trinity of machine longevity.
Need spare parts? Order genuine filters, seal kits, and blades from our Spare Parts Department or contact our service team for a remote diagnostic session.
Previous Page:
Related News
NanTong HAVI CNC Machinery Co., Ltd.
Phone/WhatsApp: +86 17606524813
Address: Libao Development Area,HaiAn jiangsu China